
A thorough air conditioning installation process has several steps that the professional servicer should walk you through. Learning about the HVAC system installation procedure and phases is essential for owners to judge the company’s value in doing the work. Also, knowledge of components will help with any and all maintenance in the future that contributes to the lifespan and effectiveness of your system.
This article will outline the process of installing an HVAC system from start to finish. It is easy to cut corners so that an A/C unit will run “good enough.” Still, these types of procedures often mean losing thousands of dollars in electric expenses. If you are looking for a central air system, it would be best to know the ins and outs of an air conditioner system installation from start to finish.
We know that making a customer understand this process of installing air conditioning is inconvenient. However, it allows you to select a company whose installations are well maintained. It’s not an expert manual, but you can’t do this installation yourself. Air conditioner installation should always be done by an authorized professional. By all means, feel peace of mind knowing that this guide will give you the information that you need to understand the air conditioning process and allow you to choose the company that suits your needs and does the job correctly.
New HVAC Installation Guide for Central Heating and Cooling
Suppose the home doesn’t have central heating and cooling already installed. In that case, the installation process and steps require much more labor and will probably cost more. A new HVAC system is exciting for the homeowner. However, understanding the process from start to finish helps the technician and owner stay on the same page throughout the process.
New HVAC installation requires several steps in its process, including choosing the best place for the AC unit and thermostat, selecting the right unit size, installing new ductwork, considering cost-efficiency, going over safety and arrival procedures, removal of old equipment, and installing the latest equipment.
Without proper planning, the team installing your new HVAC system won’t be able to keep you in the loop. They also probably aren’t organized for the job to be done as efficiently as possible. Keeping tabs on the process can help you know you are getting the best HVAC installation job possible from start to finish. Read on for the complete process of HVAC installation.
Planning and Home Estimate
Any sound HVAC installation starts with a friendly home visit and the team looking over the square footage of your home. Your AC installation requires several prep stages, including the location of a large furnace and AC equipment and sites for ductwork within the walls.
An energy-efficient system from your HVAC specialist needs to meet the specifications of your square footage. Some measurements may need to get taken while the technician first visits your home. These measurements help aid them in choosing the perfect sized quality furnace and ac unit for your central heating and cooling.
Size up the AC Unit
The size of these units is critical for air quality. If the unit is too small, the air can’t get cleaned at home easily. Heat gain in your home also accounts for the size of the team. Knowing how much of the heat remains in your home can help the technician determine the most energy-efficient unit for your house.
A too large space can compromise energy efficiency – and possibly even shut off – before the air has entirely run through the system. It is best to consult a technician about everything, including unit size and the size and positioning of the house concerning the sun.
Arrival of the Install Team, Review, and Safety
Many good HVAC businesses send pictures and have a company bio of their company that will work in your room ahead of time. This makes you feel more secure to anyone inside your home when they enter.
Communication is the critical aspect of a successfully installed system. When the driver arrives, the installer shares and inspects the job data with you. This ensures that expensive errors are avoided during the installation.
The other team will use this time to start placing a protective floor and installing tools and equipment. They’ll also begin an upcoming safety process which includes shutting off electrical and gas supply systems for current HVAC.
Planning the Replacement or New Installation of your Central Air Conditioner
Modern air conditioners are approximately 20-500% bigger in height, length, and width. This allows for larger coils which makes the air conditioner more efficient. Because of the largest size of modern air conditioners, the current placement of your old ac unit might not have enough space to permit the installation of the new one.
Some state or manufacturer regulatory restrictions require the unit to be at a specific distance from the utility meter. For some of these tasks, there must be moves in place or modifications to the ducts. Modern ac units are much calmer and more efficient than their predecessors, which means the costs of your equipment can often be reduced. It also makes them much more efficient and quieter than they were, implying that closer placement to your home might not be as loud as you think.
Prepare the Area for the New Central Air Conditioner
Some technicians claim that a composite pad isn’t necessary and can crack and shift very drastically. Others are convinced that putting concrete slabs onto the newly installed air conditioning unit is better to hold up more heat. However, most residential ac units fit on a composite slab, which may be better because it’s usually more equipped than concrete to withstand the vibration of machines. They can reduce the noise and vibration and maybe the option your professional suggests.
Moving this device into a position requires disconnecting the cables. Conversely, this movement can cause permanent damage to the system if it is not done correctly. New air conditioners are larger and tall than their predecessors. It is necessary to level the floor to get a pad in place. Good HVAC businesses use a gravel base to level out or expand the new unit’s area. This pad is made entirely outside to ensure long life and durability.
The Best Place for the AC Unit and the Thermostat
Any AC system can cause noise. So you want to keep the new one hidden from you and your family. You will also want to carefully consider where to install a thermostat that explains the control over the room temperature to make sure the entire home is comfortable. These are both choices that your technician will go over with you to personalize the setup.
Try not to place the unit’s exterior components near the bedroom as this could cause an annoying situation in the future. You can install smart thermostats that automatically adjust the temperature reading to create ideal living conditions to improve energy efficiency. You will also be able to learn and keep track of how much you can save if you use a smart thermostat with your new HVAC installation.
Removing your Existing Central Heating and Cooling System

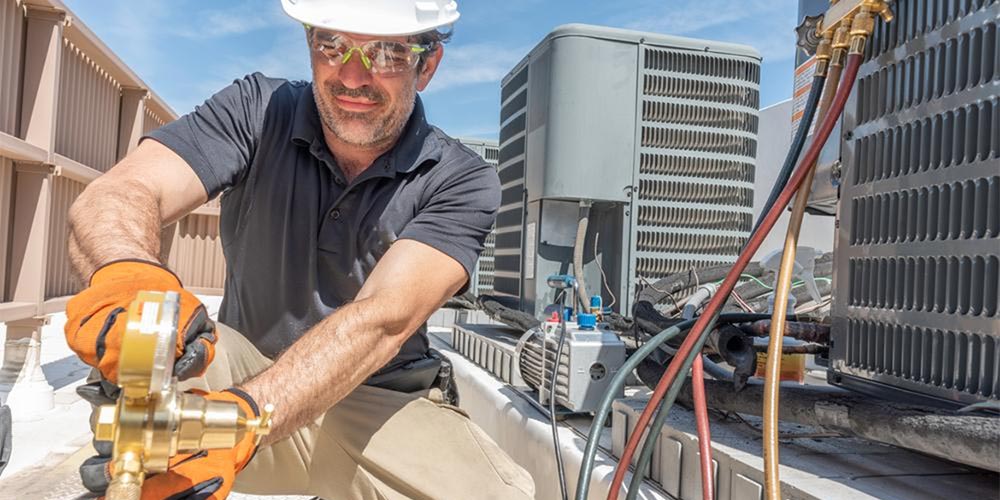
Your existing conditioner is loaded with refrigerant. You have to remove it before installing a new one. Under EPA standards, dumping this toxic chemical is an unlawful act. A recovery machine along with a recovery tank is required to safely and legally remove the refrigerant.
This one method only enables safe removal from specific air conditioning units. Any person working with refrigerant on any apparatus must have an EPA certification. Good HVAC contractors replace the disconnect and the whip to keep the system safe.
Installation of the New High and Low Voltage Wiring
There are two main kinds of disconnect boxes – one is fused the other is non-fused. Suppose the cable is connected with a fuse and no fuses. In that case, it is allowed to provide enough protective overcurrent to meet the manufacturer’s requirements.
The service disconnect has specific positions to connect the high-voltage circuit in the power system to the panel. The low voltage control connector allows the unit to run in the proper thermostat setting and humidity within the house. All current wiring is tied to the computer board within the furnace at the designated terminal connections. It won’t pass the code requirements if this is not. Air conditioning condensers are connected at correct positions directly to the condenser.
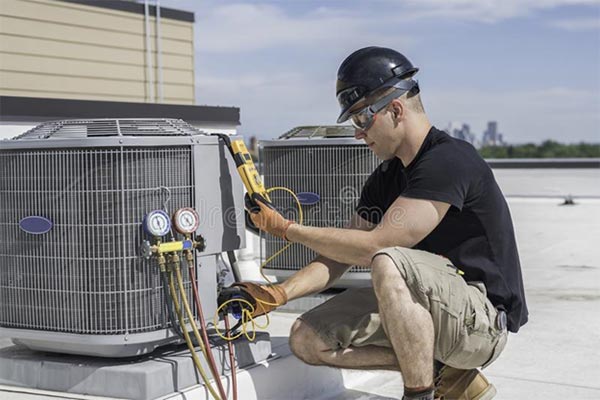
Installation of New Copper Refrigerant Lines (line set)
Two different copper and airlines are grouped into this new line. The taller line is labeled the circulation line; the small line is the liquid line. The key is to install the line with as few bends or turns as possible.
It will be common to apply the system closest to you to walls and ceiling beams. The line set should be new and installed as a one-piece, without sharp cuts or kinks, and secured with a relevant hanging system. A small low voltage control cable runs from the furnace to air conditioning outside and into the new indoor air exchanger coil.
Installation of the New Indoor Evaporator Coil
There exist two options when the installation of evaporator coils. The preferred options are a case-in coil because they come in an insulated case with removable panels on the front allowing for access to the coil inside. But an uncased coil provides the same warmth. Uncased coils usually are more challenging to install.
There is no difference in warranty or life expectancy between all kinds of coils. The drain pan on the coil is plastic, so the rails must be fabricated to assure that the coil sits within the correct distance of the exchange. This distance ensures that the drain plate will never melt.
Installing new ductwork
Not all homes have ductwork. If it is possible for installation, the technician will make certain that everything on your HVAC system is installed without changing your home for a new one. The best place to hide ducts includes closets or attic ceilings and could require cutting drywall for the installation process.
Ductwork design is crucial for efficiently reaching all rooms. The technician shall design a plan of operation and determine as much safety and usefulness as possible when completing the installation.
Clean Up and Closing Process
The cleaning procedure is relatively simple. All materials should be loaded and taken out of the home. The floor guard will be rolled down in order to keep everything from installation into the drop cloth and out of your home. A final mechanical step and a mounting cap are to be installed inside the outer part of the unit. It is aimed at preventing equipment breakdown and theft if refrigerant leaks.
After the final walkthrough, the final signatures and the payment procedures are gathered. After an assessment of the commissioning and the thermostat operation, another evaluation is necessary. A final inspection of this completion should be carried out too, either by the city or county where the installation took place. Your HVAC installer should help you take care of this necessary step.
HVAC Installation Guide for Homes with Central Heating
First of all, if your home is already equipped with central heating and air conditioning, the installation process is much more straightforward. However, there are still several steps that need consideration for your new heating and cooling to make sure that they are energy efficient and installed correctly.
When a central heating system is installed, a technician needs to add a few changes. There would already be ducts connecting your furnace or central heating and cooling. Still, upgrades to the furnace ducts and air intake, as well as other factors, could help ensure the quality of air forced into your home.
If you decide to have a new heating system installed in your home, it is crucial to keep in mind upgrades for airflow and quality that might be overlooked. Although you still have ductwork in place, it may be necessary to upgrade your system. Possible improvements may include the modification of the furnace or the heating system to facilitate air conditioner installation and the transformation of the duct system in order to ensure the quality air is distributed effectively through your home. These details help the new unit to run correctly in relation to the heating system and the central air overall.
Examine the ductwork
If the debris blocks airflow in the ductwork, the technician should clean it. Even if you purchase the most costly HVAC equipment, the money is wasted when air reaches clogged ductwork. The technician should first repair damages and seal the ductwork and then seal it in tightly sealed ductwork. If debris blocks the circulation of the atmosphere, it must be cleaned and sealed. Tight sealed ducting and insulation will significantly improve performance and reduce your electricity bills.
Cost of Energy Efficiency
Increasing Energy Efficiency is another reason for current owners of an HVAC system to upgrade. For this kind of rehabilitation, there is no fixed price and the cost of putting in new equipment varies and is affected by multiple factors.
A technician will inspect your property before completing the cooling installation and can provide a pricing estimate. The technician inspects every component of your heating and cooling system in hopes of determining how to make it the best for your family. The specialist may also give an estimate for duct, unit, and overall maintenance estimates.
Sources:
Share this article