
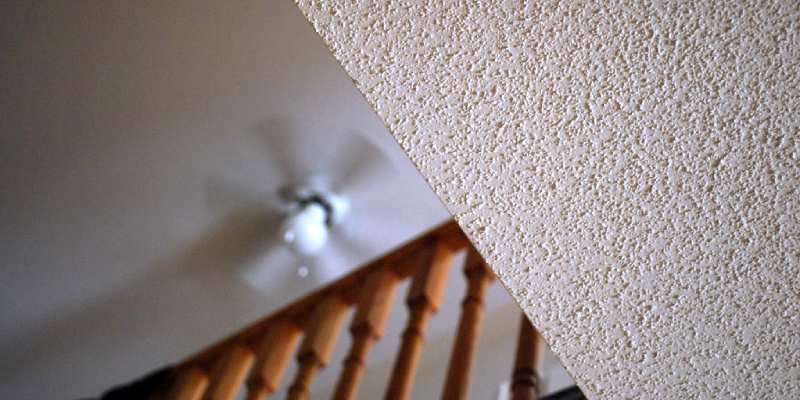
Popcorn ceilings used to be the real craze in the 60s, 70s, and 80s. It was an instant way to add texture and hide ceiling imperfections without spending extra on paneling or skim-coating. Almost all homes in upscale neighborhoods sported stucco ceilings. However, the trend soon died down as the lethal effects of asbestos came to the limelight. Almost all popcorn ceilings dating back to those decades contained asbestos. This friable substance has the potential to cause lung cancer and other respiratory diseases when present in trace amounts. It raised a hue and cry among homeowners, who soon began searching for ways to get rid of their stucco ceilings.
Right now, there are quite a few homes across the fifty states that feature popcorn ceilings. Apart from being a potential health hazard, they can pose a real challenge during the times of renovation and repair. Even the smallest cracks and holes on popcorn ceilings can be extremely difficult to fix. Matching the texture to the surrounding area is next to impossible without the intervention of experts. As a result, several smart homeowners are removing popcorn ceilings altogether.
Does your ceiling have asbestos?
Removing stucco ceilings is a taxing job, but if you have a sturdy substrate underneath, it is worth the try. Before you go ahead with your scrape test, you need to test for asbestos. Every popcorn ceiling dating back to the late 60s or mid-80s has high chances of containing asbestos. Instead of thinking about DIY techniques for the removal of popcorn ceilings, owners of old homes should consider contacting local asbestos removal companies for a quick test of their ceiling material. In case your ceiling contains asbestos, you should cover the popcorn texture with new drywall, stretch fabric ceiling or tongue-and-groove boards securely.
Popcorn ceiling alternative
The new stretch fabric ceilings come in different textures, finishes, and colors. They can add a new dimension to your household without burning a hole in your pocket. Furthermore, most homeowners are going for stretch fabric ceilings because they are non-messy, durable and eco-friendly, unlike most popcorn ceiling removal or replacement methods.
Begin with a scrape test!
If the ceiling asbestos test comes back negative, you should go ahead with the scrape test. First, you will need a garden water sprayer that can spray moisture on the ceiling evenly. You should not spray too much water, or it can soak through the ceiling and damage the underlying structures. In most cases, the water should soak through within 15 minutes. If that does not happen, spray once more and wait for another 15 minutes. In case the water does not soak in, you can be quite sure that the previous owners had painted the ceiling or mixed paint to the texture mix. That just adds another hurdle to the already messy job!
Get some plastic or non-canvas drop cloth
Before you undertake the big project, you need to prepare for a messy beginning. It is time to invest in some reliable quality of plastic drop cloths. DIY experts typically avoid cloth drop cloths since they are not soak-proof. Since plastic drop cloths don’t soak through, they provide better protection to the walls, furniture, and electronic appliances. The plastic material makes clean up a lot easier too. You can merely ball it up and toss it with your non-recyclables. While environmentally conscious folks might have something to say about that, we have found that to be the easiest way to minimize the mess.
It is time to move the furniture
Once you are laying the plastic drop cloth, you should know that it is time to remove the furniture out of the room. Move the lighter stuff like the ottomans, coffee tables, small cabinets, and drawers one by one into the hallway. If there are several heavy furniture pieces including cupboards or wardrobes, dressers, and beds, try to move them away from the edges and cover them with a plastic drop cloth. You don’t want the furniture to come in the way, when you reach the corners of the ceilings, and you don’t want the popcorn texture to find its way inside the furniture.
Remove the electronic fixtures
Next, you should always remove the fans, lights and any other electric installation from the ceilings and the edges of the walls. You don’t want to mess around these fixtures with a water sprayer. If your ceiling has recessed light fixtures, stuff rosin paper or newspaper in them to ensure dryness and safety. While working on the ceiling, always ensure that the main power to these fixtures is cut-off at the fuse box.
Work in small sections
Before you begin the real work, divide the entire ceiling into several sections. Ideally, work 4×4 parts of the ceiling at a time. Wet one section with a pump sprayer and wait for at least 15 minutes. Make sure to give a light spray only. In case your stucco texture contains a layer of paint, you might find it easier to remove it by dry scraping. Conventional popcorn ceilings without asbestos yield easily upon presoaking and scraping. If you want to minimize the mess, double mist the drywall at an interval of 15-minutes to ensure easy removal.
Points to remember
- A mud pan can come in handy to reduce the mess. It can catch the popcorn before it scatters on the floor and breaks into a million pieces. Most importantly, it will keep you from tracking the texture all over the floor as you move from one spot to another.
- Always round the corners of the scraper off to prevent unwanted nicking and gouging. Sharp edges can result in visible unevenness on the ceiling. It can take hours of puttying and painting to cover these ceiling wounds. So, always use a drywall taping knife or a common putty knife to round off the sharp corners of the scraper before use.
If removing the popcorn ceiling seems too much work for you, always contact an expert. Expert assistance in the removal of popcorn ceilings is expensive, and not a lot of homeowners can afford that. Smart homeowners prefer layering their existing popcorn ceilings with stretch fabrics or beadboard to cover up the unsightly bumps and to encapsulate any asbestos that may be present.
Share this article