
Woodworking and DIY are good hobbies to have, especially when you’re focusing on outdoor furniture.
But it’s not easy by any means. It takes a lot of time, a lot of planning and quite a bit of elbow-grease for most projects too.
The most important thing however, is practice. If you want to make anything advanced, you have to work hard to get to that level.
And you’re going to have to start pretty small. There’s quite a few straightforward projects that people of little experience can finish pretty handily.
Every easy project you work on will provide you with some valuable insights into the art of woodworking. You’ll get a good base for your future with the hobby.
So here’s three woodworking projects for beginners to try out:
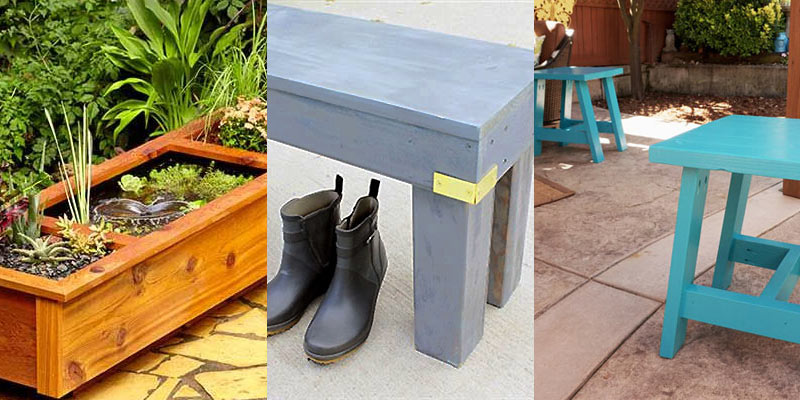
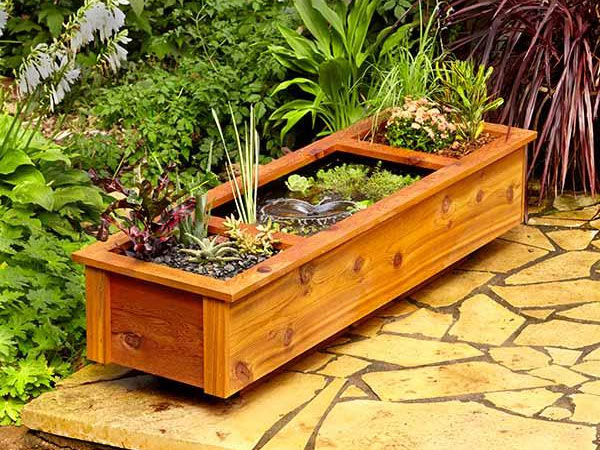
1. Garden Pond and Planter
Source: https://www.familyhandyman.com/landscaping/backyard-ponds/one-day-diy-patio-garden-pond/view-all/
This is a very easy little project for you to try that will cost you less than $500 too. And you can put this together in a matter of hours.
It would be a great project to try on a Saturday, just to get the ball rolling on your woodworking venture.
The end result will be a patio box that doubles as a small pond and a place where you can plant some flowers. It will look lining a wooden deck in your garden.
This is made up of a few different parts: You’ve got the bottom boards, the divider and corner brackets and then the face frame.
The bottom boards are really, simple. You’ll just need to cut them to size and then glue them together with some construction adhesive.
The sides and the dividers will take a little bit more cutting and will then need to be fastened into place on the bottom boards with adhesive and trim-head screws.
For the corner brackets, you’ll need to install four aluminum angle brackets too. Easy enough to do but they will need to be cut with a hacksaw.
Then the face frame itself is pretty straightforward. It’s ins four pieces that need to be joined with screws.
Once that’s done, you can apply some liquid rubber into all of the seams to ensure a watertight seal.
So a fairly simple process overall, and you can check out the full tutorial here on familyhandyman.com.
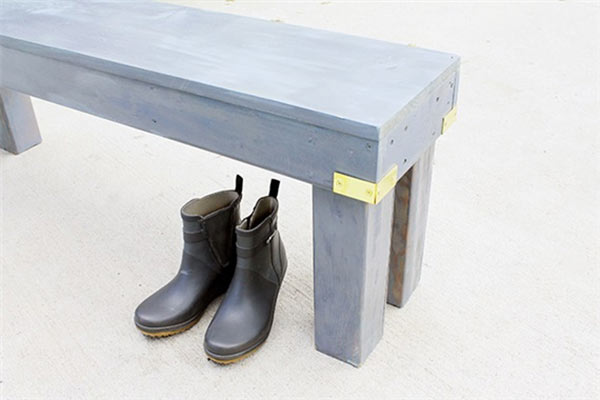
2. Simple Outdoor Bench
Source: https://www.blackanddecker.com/ideas-and-inspiration/projects/simple-outdoor-bench
A bench is a staple of easy woodworking and is often a project undertaken by beginners. This is probably one of the easier overall methods.
This will be a fairly small bench when it’s ready and it shouldn’t take too much time or require a huge amount of materials.
The frame of the bench will be made up of two long planks of wood and another four smaller ones.
You’ll use these pieces to make a rectangle of wood that is split into three sections. The two smaller, dividing beams in the centre of the rectangle serve as a support for the seat plank.
Once you’ve screwed these six pieces together you can screw the seat on top, ensuring that it’s flush with the frame.
You’ll be doing a fair bit of cutting with each of these planks to ensure the length so a good table saw would be beneficial, perhaps even a hybrid.
Securing the legs into place shouldn’t be too difficult. Just ensure that they’re all the same length and that they are flush with the inside corners of the bench.
You can add brass corner brackets to the outside of the bench too if you want a bit of extra support.
And with that you’ll have a solid, sturdy little bench for your garden. Check out the full runthrough here on blackanddecker.com.
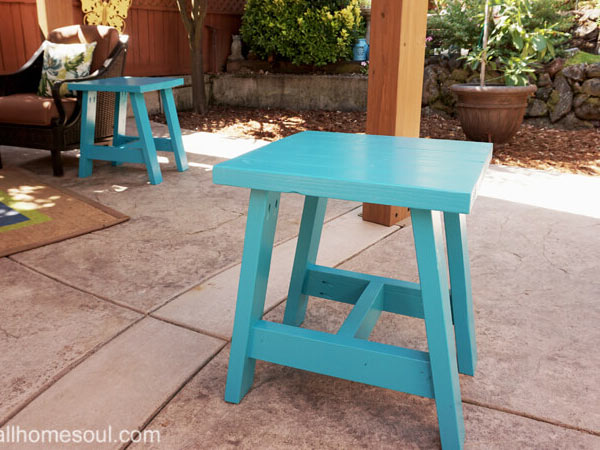
3. Outdoor Table
Source: https://www.smallhomesoul.com/build-2×4-outdoor-table/
If you’re building a bench, you might as well build a small table for your patio too. This is probably the most difficult of the three we’re talking about but it’s still simple enough.
Because of the shape of this and the position of the legs, there is quite a few different boards and a fair bit of measuring and cutting.
The top of the table will be made up of six boards of equal length, which are screwed together and then there are four boards for the legs, also of equal length.
You’ll also need to make cross supports for the legs and a centre support beam too. Cutting all of these will take a little bit of time and you will have to drill in pocket holes.
This will require a kreg jig of sorts and these need to be very precise so be careful not to make any mistakes while cutting them.
Once all the holes are cut into it it’s just a matter of screwing all of the pieces together. A paint job then would be a good addition, but if not you’re good to go.
Have a look here on smallhomesoul.com for the full procedure.
Conclusion
Woodworking is a lot of fun once you get the hang of it and it’s always rewarding to see the results of your hard work.
Trying your hand at simplistic projects such as these ones here is a great way to get some of the basics down.
Share this article