
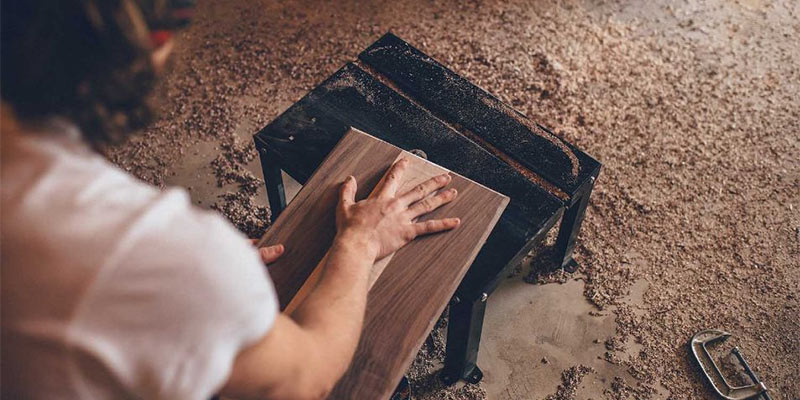
You know it, I know it and everyone knows it too – sanding is a chore. It takes a long time, it’s hard to get good results and it leaves a mess everywhere but what if I told you it doesn’t have to be like this? That’s right, there are a few great ways to make any sanding task a breeze while also ensuring great results and making it an actually enjoyable activity. They’re simple to apply, affordable and incredibly effective so without further ado, let’s have a look at them and revolutionize your DIY life!
Choose the Right Tools and Sandpaper
One of the most common errors that people make when sanding is using the wrong tool and sandpaper for the task at hand. Mixing these up can make an easy and quick job into a difficult and long one so it’s crucial that you learn how to choose properly. When it comes to the tool, it’s quite simple – here are the most popular sanding tasks and what tools excel at them:
Long and rough surfaces
Belt sanders are generally very powerful and have wide sanding belts, making them a fantastic choice for this type of task. Random orbital sanders are the most versatile choice of all and as such, if the model’s big and potent enough, they are great to decimate rough stock as well.
Tight but smooth surfaces
Palm sanders (small, one-handed machines) of any type – square sheet or round orbital – are a great choice for fairly smooth but tight or intricately detailed surfaces and pieces such as cabinets, stairs, tables and chairs. Detail sanders, also known as mouse sanders, are the very best choice when it comes to tight corners and hard to reach spots as they have an unique angled sanding pad tip and some even come with a detail finger to ensure that you achieve an excellent result.
Others
Sheet sanders offer a mix of features, giving you a square/rectangular sanding pad that’s great for flat surfaces while also delivering quite a nice amount of power and differing sizes (from 1/4 sheet to a big 1/2 sheet pad). Random orbital sanders, as mentioned above, are the jack-of-all-trades of the sanding world. They’re powerful, can easily take on any task with the proper sandpaper in place and they deliver some of the very best finishing results out of all due to their famous, foolproof random orbital motion. Other lesser known machine types such as combination sanders (belt and disc), drum sanders and spindle sanders have their own unique uses but they’re more aimed at professionals so we’ll give them a skip for now.
Now that you know which tool to use, you’ve gotta use the proper sandpaper grit for it. You should try to get a fairly wide variety of sandpaper grit – from coarse (20-100) to fine (1500) and everything in between – allowing you to ace any type of stock. For the most part you always start with a lower grit, then start climbing up the ladder until you finish it off with a very fine grit to achieve a shiny, silky smooth finish. Using a low grit on a semi-smooth surface will only further ruin it and using a high grit on a rough surface will have little to no impact on it so be sure to keep the grit levels in mind. It’s that easy.
Go Cordless
One of the worst aspects of sanding is the messy wires that always get in the way of your progress and limit your movement so why not simply get rid of them for good by going fully cordless? While in the past cordless sanders weren’t a very good choice due to their lack of power or lack of battery durability, these days these problems have been fixed and you can get some excellent cordless sanders right now that perform perfectly and not only last a long time but also recharge super quickly. Time to go cordless!
Use the Proper Equipment
Often overlooked as an unnecessary step, using the proper equipment and protection is an essential part of making sanding a piece of cake. They make it much more comfortable, safer, faster and even provide better results in the end. Due to this, always remember to:
Use a dust mask
The classic. Wearing a dust mask ensures that you don’t breathe in the dust and debris flying everywhere which without proper protection can not only harm you but also irritate your nose, mouth and lungs enough to make you perform worse and stop much earlier.
Use protective glasses
Believe me when I say that you have to use these. I’ve had splinters fly off and hit me right in the eye before and I promise you it’s not fun. Even if you’re lucky and avoid the flying pieces, the dust will irritate your eyes considerably and bog you down eventually. Grab a pair and wear them, it’s more than worth it.
Wear anti-vibration gloves
A trick of the trade that most beginners don’t know about is using the wonderful anti-vibration gloves. As the name implies, they deeply reduce the amount and strength of the vibrations that go from the machine through your hands and all the way up to your arms and shoulders. Not only will this make sanding much more enjoyable and easy but it will spare your body from fatigue, making it easy to sand for extended periods of time without feeling sore.
These are the essential equipment pieces to ensure comfort and safety. There are others that can further improve these factors, to learn more about them take a look at this complete list by the University of Western Australia.
Conclusion
While it doesn’t have the best reputation, sanding can be a truly fun experience that can even turn into one of your favorite hobbies – IF it’s done properly. By following these simple steps you’ll not only achieve better results but you’ll have a much more enjoyable time as well so don’t hesitate and grab the sanding machine – it’s time to put it to good use!
Share this article