
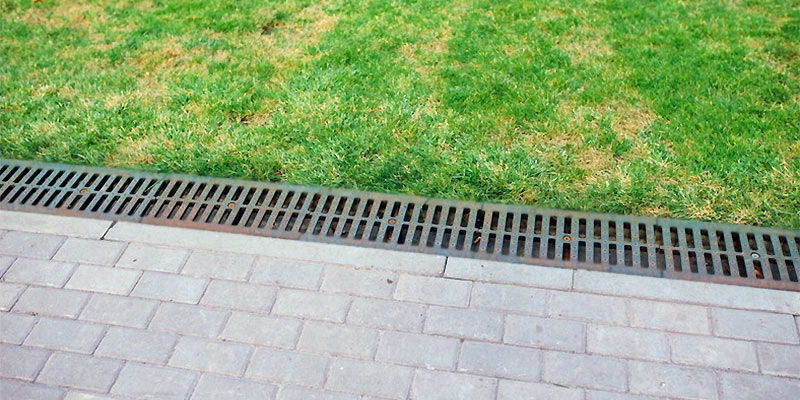
ACO drains are a popular type of channel drain (sometimes called a linear drain), which drains surface water from paved, tarmacked or concrete surfaces, then redirects it to a main drainage system. ACO drains connect to your existing underground drainage, usually via an existing piece of above ground pipe connected to your underground drain.
Installing an ACO drain is straightforward and usually takes two to three hours; you will also need to set aside time before and after installation for the concrete used in the foundations and backfill to set.
Buying your ACO drain
Before you go shopping work out the length of the ACO drain you will build – your ACO drain should be as long as required to prevent surface water from draining into places you don’t want it to – for example if there’s a danger of water draining underneath your garage door, your ACO drain can match the length of that door. Your ACO drain will comprise the parts described below; all available separately from most DIY and plumbing supply shops. You will need to buy enough channel drain sections and grating for the entire drain; for everything else you only need to buy one item.
Channel Drain Sections
These form the main body of the ACO drain – basically the channel the water will flow down. Sections come in 1 metre lengths and have a slot on one end and a groove on the other, meaning you can connect sections together easily without needing any other equipment. The sections can be cut to size with a hacksaw, so don’t worry if your trench isn’t an even fit with the lengths.
Each section also has a Circular Base Outlet on its underside. These outlets can be pushed open before installation, allowing you to connect the ACO drain to the underground drainage pipe so water can flow out of the ACO drain and underground.
Anti-slip guard grating
These sit on top of the channel drain sections and have openings that allow water to enter the ACO drain. Grating typically comes in PVC or galvanised steel and connect onto the drain sections without the need for any other materials. The length of grating you purchase will have to match the length of your ACO drain, but as with the drain sections, these can also be cut to size with a hacksaw.
End Outlet
This fits onto the lowest end of the drain and connects to your main drainage pipe so water can flow out of your ACO drain.
End cap
This seals the highest end of the ACO drain so water can only flow downwards towards the End Outlet.
Sump unit
The sump unit acts as a filter, preventing any dirt or debris entering the ACO drain from getting into the storm drains. The sump unit sits at the end of the drainage channel and will require emptying periodically to ensure the ACO drain functions correctly.
Depending on the layout of the drain you require you can add the following:
Quad section
If you’re building more than one ACO drain, or your drain needs to go around a corner, quad sections act as a junction, allowing water from multiple ACO drains to meet before heading into the main underground drain.
Downpipe channel connector
If you want to connect a downpipe directly into the channel body (instead of letting the water fall through the grating) a channel connector can be installed. These eliminate the risk of blockages and allow a full flow of water into the ACO drain.
Preparing to install your ACO drain
Before you begin installing your ACO drain, check you have the following equipment and tools to hand;
- A spade or pick to dig the trench that the ACO drain will sit in
- String to run along the length of the trench to judge the depth
- Concrete to fill the trench, creating a foundation for the ACO drain
- Masking tape – you’ll use this to protect the grate before you pour the concrete backfill
- A hacksaw to cut your final lengths of drain and grating to fit your trench
- Silicone sealant – closing your joint and end cap with sealant will help it last longer.
Installing your ACO drain
1. Dig your trench and lay your foundations
First you will need to dig the trench that the ACO drain will sit in. Your trench will need to be wide enough to allow at least 100mm of concrete backfill on either side of the ACO drain when it has been installed. Dig deep enough so you have around 50mm spare to fill with concrete to act as a foundation for the drain sections. Once you have laid your concrete foundation, leave for 48 hours to dry, covering the trench if necessary to protect it from rain water.
2. Mark your line
With your foundations set, you can now install your ACO drain. Using your string, mark the line along the trench that will show the finished level of the grate. A good rule of thumb is for every 1 metre of drain you lay, the level will fall by about 5mm.
3. Connecting the drain and sump unit
Connect the lowest part of the drain section to the underground drainage pipe. You can do this with either the preformed channel bottom outlet or an end outlet. On each channel section there is a circular section (called an outlet connector) that can be knocked out so water can drain down into the drainage pipe. Before laying down the section push out one of the outlet connectors on the bottom of the drainage channel so you can plug in the sump unit.
4. Installing the ACO drain
Starting at the lowest point of your drain lay the channel drain sections – each length connects to the next via its inbuilt grooves and slots – stop when you reach the last section where your drain will end as it most likely will need cutting to size.
5. Cutting to size
Cut the last length of drain section with a hacksaw so it fits the drain, then connect it to the previous length of drain section.
6. Capping
Fit the end cap on the last piece of drain section (this will be the highest point of your drain). Now seal the end cap and any joints with a silicone sealant – this is optional, but highly recommended as it will make your drain stronger and longer lasting.
Water will now be able to flow into your ACO drain, before heading downhill and underground into your main drain.
7. Place and tape your grate
Connect the grate over the channel sections – the grating will connect to the top of the channel sections through inbuilt slots. Once the grating is in place cover it with masking tape. This will protect it when pouring your concrete to form the backfill on either side of the channel.
8. Pour concrete to form the backfill
Pour in concrete to form the backfill on either sides of the channel. By putting the grate on top beforehand, wet concrete won’t be able to get into the channel. Make sure to finish the concrete just above the grate (about 2mm) to help make it secure.
9.Wait 72 hours for your concrete to dry
Leave the concrete to set for 72 hours before removing the masking tape. Be careful not to drive any vehicles over the ACO drain before the concrete has set.
Your ACO drain is now installed.
About the Author
Josh is the founder of Quick Clear Drainage, who are drain unblocking and CCTV specialists operating in London and surrounding areas.
Share this article