
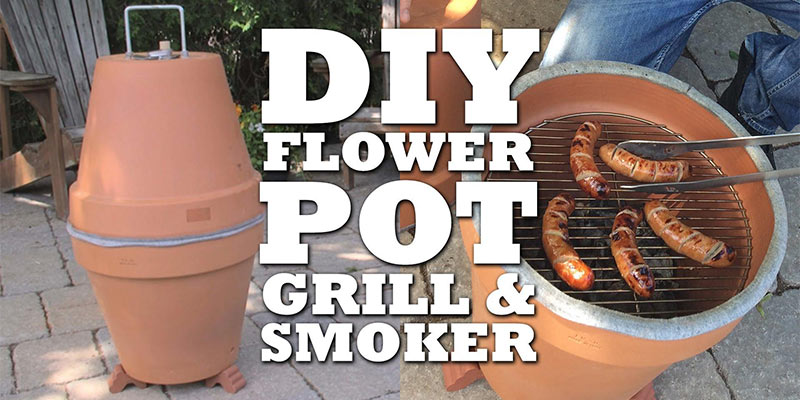
Who doesn’t love a perfectly grilled burger on a Sunday afternoon? Homemade Grilled foods just taste a hundred times better than the traditional pan cooking foods. On top of that, the joy of grilling on your garden or backyard while drinking a cold beer is a unique experience and no pan cooking can replace that.
But, while some people just simply go on their local store and spend hundreds of dollars on a Weber grill, you may prefer to go for a much cheaper option and build a DIY grill for your backyard.
There are a lot of tutorials out there who tell you how to build big and complicated garden grills with bricks and other heavy duty materials, but in this step-by-step guide, I’ll show you how to build a simple bbq charcoal grill with a few basic materials everyone has in their backyard.
For this project, all you need are a couple of simple and inexpensive items:
Required Tools & Materials
- 2 Clay Flower Pots – 18″ inches in circumference
- 1 Round Grate for Grilling
- 1 Base for the Charcoal
- 1 Barbecue Gasket
- 1 U Bolt
- A Drilling Machine with Drill Bits
- 2 Wine Corks
- 1 Brick
- Charcoal & (Optional) Smoking Chips
- Ten Foil & Oven Thermometer (Optional)
Building Process
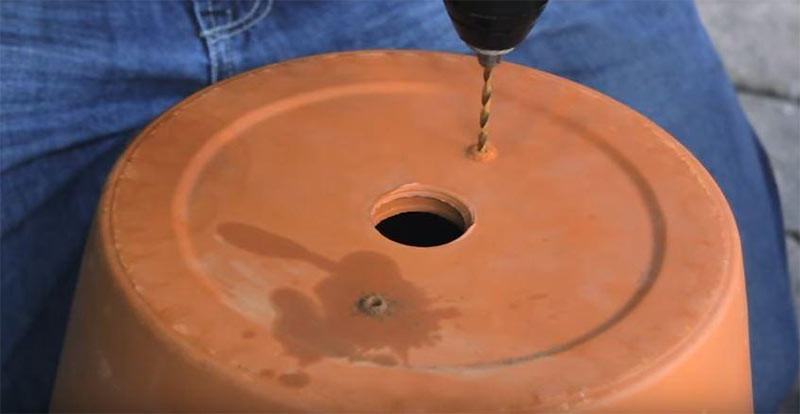
Step 1) First, we will start by drilling two small holes at the bottom side of the flower clay pot. You need to make sure to measure the holes to be wide enough for the ‘U’ shaped bolt to fit inside them properly.
Also, have in mind to start with a small drill bit at first and then widen the holes with a larger drill bit. This way, you will lower the risk of damaging or cracking the pot and maybe ruin the project.
Step 2) Then, grab the bbq gasket and start putting it around the rim of the top of the clay pots. The bbq gasket will protect the final grill from cracking when you close/put the ‘lid’ (the second clay pot) on top and also will insulate any smoke that may get out from the middle line.
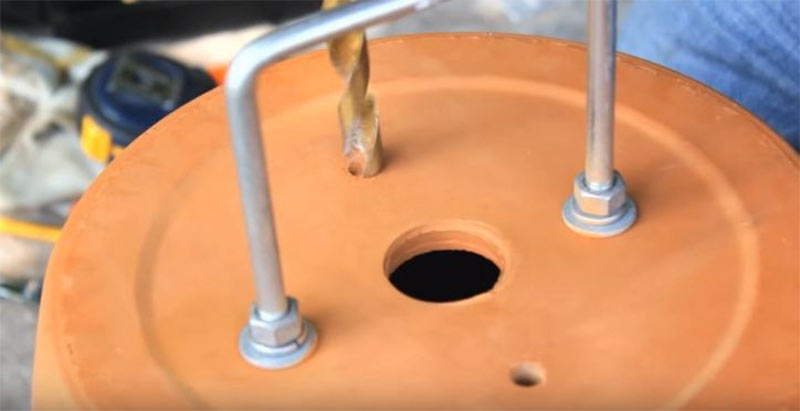
Step 3) After you make sure the drilled holes are the perfect fit for the ‘U’ shaped bolt, slide the bold into the holes and use the two nuts to fasten it in the inside side of the pot. The ‘U’ bolt will serve later as a handle to remove the upper pot when you need to access the grill.
You will find this handle very useful because of the high temperatures the grill will reach during cooking and you may burn your hands if you touch it directly without a handle.
Step 4) As a next step, you need to drill 4 other holes which will act as ventilation areas for controlling the temperature. Drill two ventilation holes on the bottom sides of the pot and two other ones on the top side, next to carrying handle.
Make sure the holes are large enough so you can easily shave down the corkscrews and fit them in and out comfortably, to use for air circulation when it is needed.
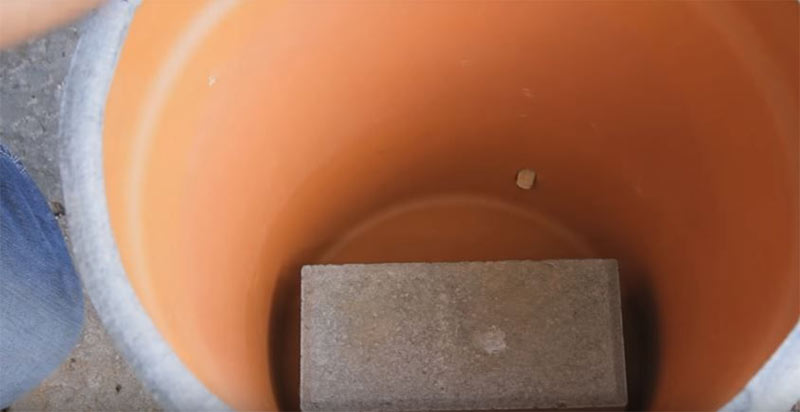
Step 5) After you have finished with the ventilation holes, get one brick and put it at the bottom of the no-handle pot. The brick will allow the charcoal base grate to be placed higher so you can add the charcoal.
Step 6) Now, add the charcoal and the smoking chips. You can choose to go with any type of wood you like but I personally prefer hickory chips which gives that amazing hickory smoked flavor to your food.
Make sure you first soak the smoking chips in the water and then add them to the fired up charcoal.
Step 7) After the charcoal is stable and warmed up, grad the grilling grate and place on top. The great thing about using a clay pot is that the lower base is narrow and the top of the pot is wide, so the charcoal will stay on the narrow bottom and you can cook plenty of food on the top of the pot.
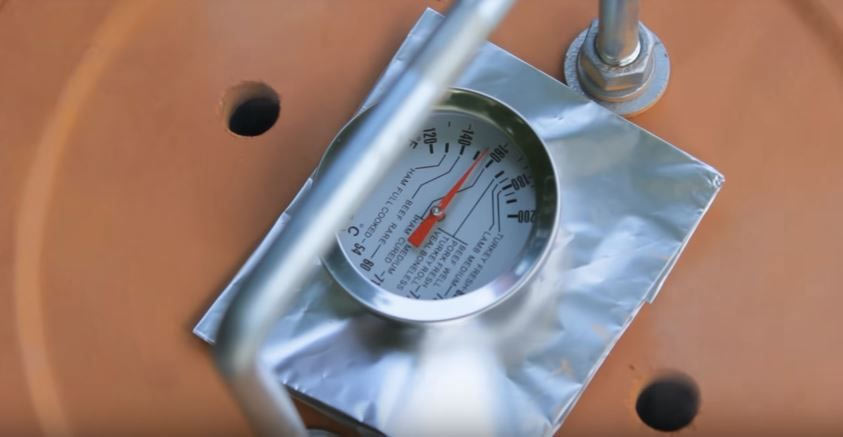
Step 8) After you have put the second pot on top, you need to grab some tin foil, fold it a couple of times and put as a cover to the drain hole, located on the top of the pot. Place the oven thermometer into the foil by poking a small hole into it, so you can regularly check the inside cooking temperature.
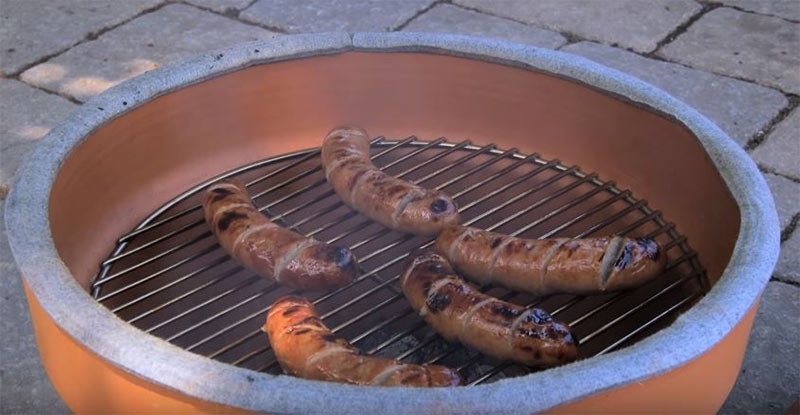
Now, grab some fresh burgers and get ready to cook your favorite grilling recipes on this wonderful and simple homemade DIY charcoal grill. I hope you enjoy!
Share this article