
See also:
Cutting down a tree the DIY way (Part 1)
Cutting down a tree the DIY way (Part 2)
Welcome to part 3 of the series Cutting a Tree Down the Do-It-Yourself (DIY) Way. Before you read this part of the series, be acquainted with Cutting a Tree Down the Do-It-Yourself (DIY) Way (Part 1) and Cutting a Tree Down the Do-It-Yourself (DIY) Way (Part 2), as there is necessary information in each of those sections dealing with safety and the proper way to take down a tree.
Having a Second Person May Be Beneficial for You
When you are focused on cutting a tree with your wedges and chainsaw, understand that you may not be so focused on the tree you are working on. Having someone keep eyes on the tree, even before it begins falling may end up saving your life. Have this person stand right behind you and tap on your shoulder when they see the tree beginning to fall may allow you enough time to dodge the fall of a tree. Depending on the timing of your take down, a tap means two different things. Early in the cut, a tap means that a branch is falling. If a branch is falling, do not look up as it may cause you to injure your eyes. Instead, leave your saw (with the blade off), and just walk away. If you are later in the cut and you feel a tap, then it means the tree is beginning its descent. Just like the early tap, leave your chainsaw and walk away while keeping eyes on the falling tree. The last thing you need is to be unconscious from a tree falling on your head or having a tree collapse on your leg and break it.
Note: Both in the tap and late taps, you stop the cutting and walk away from the tree, regardless if it is a branch of the tree is beginning its descent.
After cutting the tree down, remove the branches from the tree. If the tree is on an incline, it may be easier for you to be facing uphill and cutting upwards, as you will not need to kneel down to cut down branches if you are aiming downwards. If you are right-handed, you most likely want the tree on your right side, so you are able to use the chainsaw with the most accuracy.
Optional: Making Firewood
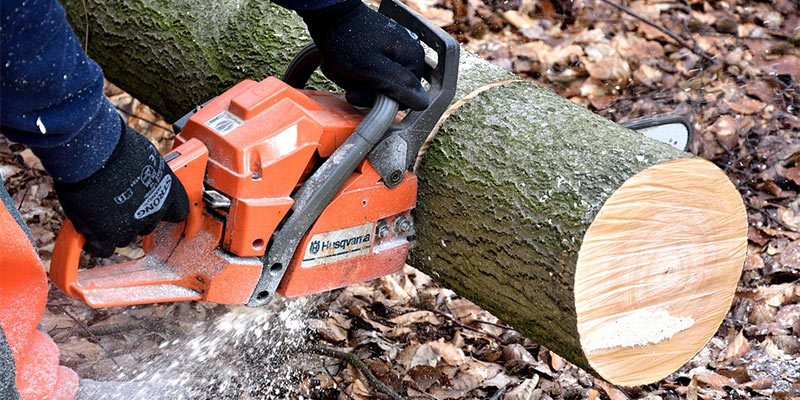
If you want to utilize the tree for the possibility of firewood, then you will want to not shred it. Take the tree which fell over and saw a portion of it 75% of the way through, and make as many cuts of firewood you desire. After you cut through as many portions of firewood that you want, then roll the firewood over and finish the cuts you made.
Summary
Now that you have gone through the third part of the series, let us review everything quickly to reinforce in our minds the steps needed to undertake this successfully. Understand, the point of this series is to SAFELY take a tree down in the direction you desire.
Safety Gear able to be purchased from Amazon.com:
- A logger’s helmet to protect your skull
- Goggles to protect your eyes
- Earmuffs to protect your hearing
- Chaps to prevent you from sawing yourself
Supplies able to be purchased from Lowes.com:
- Wedges which prevent your saw from getting pinched in during cuts
- Chainsaw
First step to do is find out how far the tree is going to fall. Trees are much taller than you think and you do not want to find that out while the tree is falling towards you. There are many methods to measure a tree, though an off-hand way is by using the ax-handle trick when you line up your ax at arm’s length and stepping back until the tree is barely covered by the ax. Make sure you add room to give yourself space though!
Next, clear a separate path to run away from. If the tree falls, you do not want to run near the direction it falls, so you need an escape route. If the tree happens to fall towards you, you are able to run in the direction you intended the tree to go towards, because the tree will not be falling in that direction anymore.
Assess the tree to see if you are actually able to handle it. If you see a tree leaning the opposite direction you want it to fall or loaded with many branches on that side, then you may need a professional with expert opinion (and cranes and machinery you do not have) to move the tree the other direction. If there are electric wires, power grids, and other materials in the felling zone of your tree, return your materials to where you purchased them and call a professional. If all these are negative, be sure to watch out for dead branches or branches which may be supported by other branches, because they may actually end up falling on you.
Next, make a proper notch to allow the tree to fall easier in the direction you want it to go. Be sure to cut it at the appropriate angles and then to make the felling cut opposite it to connect to the apex of the notch. Once the tree is separated, it should begin to fall. Be sure to plan the notch carefully. (Important: Make sure the notch is on the “falling” side of the tree, because gravity will be able to pull the tree down in that direction. However you decide to make the notch is up to you. Most people start with the top cut first and then angle the bottom notch. If you make the two cuts meet, the wedge should drop out of the notch ideally. If not, you may have to extend the cuts from the top or bottom so the wedge may drop free.
If you are cutting down big trees, use wedges to make your notch cut and then the felling cut. Stop cutting as soon as you have cut enough to squeeze wedges behind the bar. Stop the chain once this occurs and pound the wedges in. Once you have them secured, keep cutting the tree, because the wedges will keep the tree from falling on your chainsaw and locking it. Wedges keep your chainsaw from being pinched if the tree leans back away from your wedge notch. After you are done making the wedge cut with your wedges, do the same for your felling cut. The felling cut should meet at the apex of your tree. Once the tree begins leaning, remove the chainsaw and walk away from the tree while you are keeping an eye on it. Do not leave your eyes off a falling tree. Better yet, have someone watch the tree while you are cutting it down. While you are engrossed in cutting the tree, they may be able to alert you if a branch is due to fall, thus potentially causing head injury, or that the entire tree is falling, which may kill you.
After the tree falls down, cut the the branches off, preferentially with you facing uphill if there is an incline so you are not bending over the cut the branches. Depending on whether you are right-handed or left-handed, make sure the tree is on that side when you are cutting. If you wish to make firewood, cut through the tree in as many sections as you want. Saw through the tree at 75% depth and then roll the tree over 180 degrees and finish the cuts.
Be sure to recommend this to any person you know who wants to learn how to cut a tree themselves. If this is beyond your scope or would like to have a professional handle this for you, call a professional tree service to handle it for you.
Share this article