
Using a weed eater is not rocket science, but how do you operate it for the best effect?
A weed eater goes by many names. It can be called a string trimmer, weed whacker, weed-whip, or a whipper-snipper. Weed Eater is actually a brand name product manufactured by Poulan Today, though, it has seeped into common usage to refer to any weed whacker garden tool.
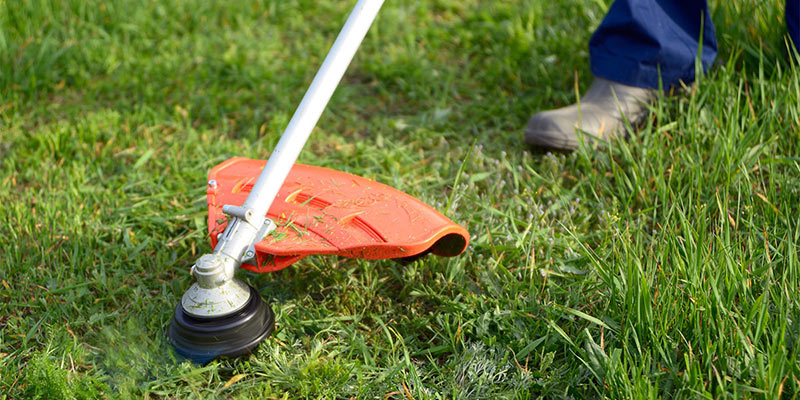
In the simplest sense, a weed eater is a lengthy shaft with a motorized cutting head. Sometimes it’s equipped with a shoulder strap and other accessories to make it easier to use. Its prime function is to cut grass close to objects or on irregular and steep terrain where a mower cannot reach.
Basic operating principles
Before anything, scour the area you will be clearing. Get rid of any stones or rocks. Although weed eaters are heavy-duty pieces of machinery, rocks cause undue wear and tear on the nylon cutting thread. This leads to the need for frequent replacement, which can be costly and tiresome.
With your basic preparation done, it’s time for ACTION.
Prime up your weed eater and get ready to do battle with the unruly yard
With a gas-powered device, perform the initial check for gas levels. Most string trimmers powered by gasoline have a choke or priming bulb – sometimes both – in order to aid cold starting. Refer to instructions in the owner’s manual or you risk flooding the carburetor. If you have an electric version, simply plug it in, make sure that the plug will not detach from the socket and you’re good to go. Take care to place the weed eater as close to the ground as you can. Like taking a warm-up stroke while playing golf, get comfy before you get started. Find the optimum position. Fire up your weed eater and off you go… Attack those offending weeds! Advance forwards with a steady side-to-side motion. Continue moving as you level the weeds.
Once you are underway, you will soon find that weeds start resisting the weed eater. As soon as this happens, simply release more thread. The method for doing this varies from model to model. Some weed whackers have a button you press, a few high end models are automatic, but most will use a bump-feed system. Get six inches or so of thread out and carry on…
Note
Do not underestimate what a strenuous activity this can be. If you feel any kind of strain at all simply take a quick breather.
Aim for a finish of perhaps 5cm off the ground. For a closer cut, break out the lawnmower. Attempting to go too close with the weed eater means that you will waste the cord as you cut into earth and dirt.
Allow the tip of the trimmer line to perform the cutting. If you are cutting tall or thick grass then aim to attack it in smaller sections. This will help to prevent the weed eater from stalling or the line becoming tangled. Forcing the equipment into making excessively heavy cuts puts undue pressure on it.
If you are proceeding at full throttle, exercise extreme caution. Damage can easily be caused to fences, trees or any decorative objects. Make sure that no bystanders bear the brunt.
Advanced tips
To guard or not to guard?
Your weed eater will come with a safety guard. For most users, this should stay in place.
If, though, you are a confident trimmer and have a good pair of safety glasses and long protective pants, ditching the guard does come with some benefits. The guard keeps the string cut at a length which can be sub-optimal. By detaching it, you can use more string – listen for a high-pitched whirring and avoid vibration – for a more effective weapon against rogue weeds. Exercise this option entirely at your own risk and only if you feel very confident with your equipment. This is no stunt for the casual operator.
Pay attention to the way the string rotates. Most weed eaters have a counter clockwise rotation. This means that you should trim from right to left. By operating in this manner, the clippings will naturally be flicked out into the yard and easily picked up by the mower. Do it wrong and the debris will be flung against the fence or house.
Different users prefer different angles but 90 degrees is widely considered to be the most efficient option.
The best procedure to adopt – assuming the counter clockwise rotation mentioned – is to kick off on the far right side facing the house. Start here and work your way carefully around. Continue with this right-to-left movement until completion.
Tapering, screeding and edging
These extra techniques really help to extract the most mileage out of your weed eater.
Tapering
When you perform this action, you simply hold the weed eater so that the string ends up striking at a very slight angle. It’s best pressed into commission along curbs, walls, fence lines or trees.
Screeding
This is a method used when grass or weeds are growing on paths, sideways or even in sidewalk cracks. Tip the weed eater gently so that the strings are just dancing off the stone. Move towards the base of the weeds and cut. Take special care when screeding: if you use too shallow an angle you will end up eating into the string rather than cutting. Conversely, when angled too sharply, the string will simply fail to hit the base and again result in non-cutting.
Edging
With parallel surfaces, edging is key. The area between the grass and your driveway is a great example. Turn your weed eater so that the string is vertical. If you are working on an area which has not been edged for some time, watch closely for rocks and stones and expect them to fly up.
Important
When you have finished your job, clean the weed eater. Never leave it clogged up and soiled. Take care of your equipment so that it performs perfectly and serves you well. Take heed of some of these handy hints and you will soon be using your weed eater like a pro.
About the Author
Hi, this is Stephen Atcheler, Editor of the Pole Saw Advisor. A Product reviewer, blogger, and gardening enthusiast. Welcome!! I started this website to help beginner gardeners to choose the best garden tools, gardening tips, and ideas from everything growing your own plants, fruits & veggies.
Share this article