
If you have any old glass bottles or other glass items lying around, they make surprisingly versatile garden decorations. Our friends from Midland Stone have provided this expert guide on recycling glass products into beautiful outdoor ornaments.
Nature holds a key to our aesthetic satisfaction and a well-maintained garden is a way to bring nature to your home. A gardener always wants his garden to look enchanting and pleasing to the eye. A garden has the most delight in the spring when the flowers are blooming everywhere, but a gardener wants his garden to look ravishing all year-round. We are going to help you to make your garden look appealing throughout the year using the captivating glass art.
Glass art
Glass art is an ancient technique to make spectacular art pieces from scrap glass and turn it into a major decorative element. It is a great approach to recycle glass. If you are going to throw away any glass, stop and think about creating amazing masterpieces which can beautify your garden.
Making glass mulch
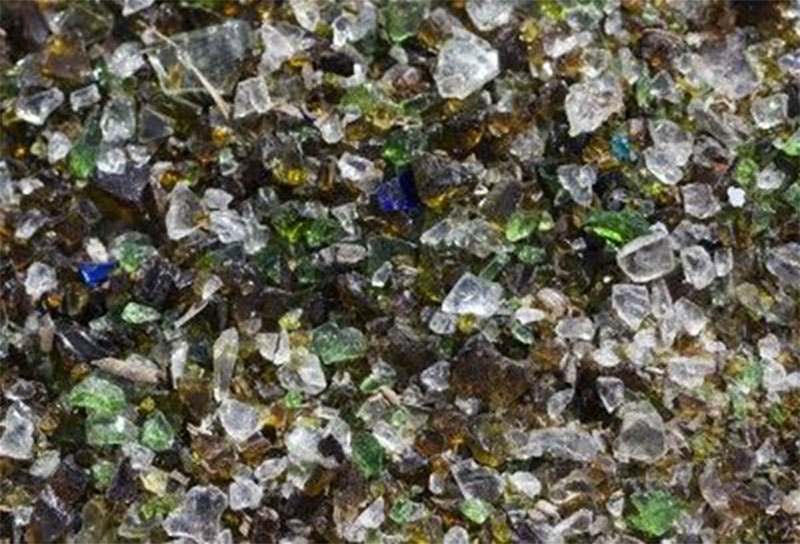
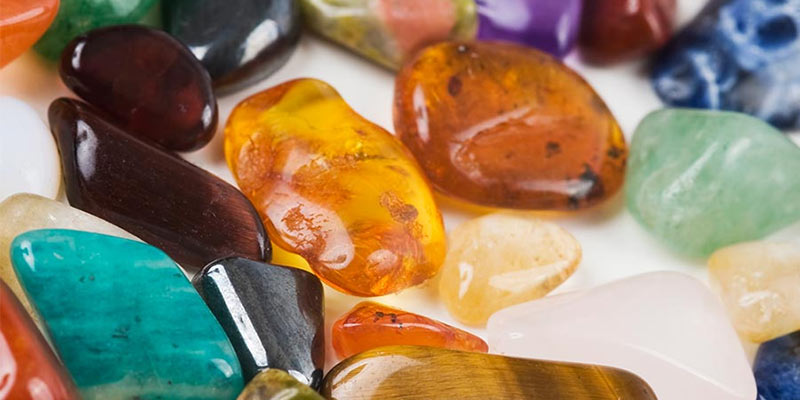
Figure 1 Mulch created with different types of glass products
Glass mulch is a beautiful product made of tumbled glass and you can also make it at home! It has number of practical and decorative uses such as in garden pathways, around potted plants and in fire pits.
Things required:
- Glass bottles, dishes, broken window glass or any other glass product
- Hammer
- Sand paper
- Canvas bag
Pro tip: use glass products in different vibrant colors to make the mulch more eye-catching.
Procedure:
- Always use protective clothes, wear work gloves and suitable eye goggles. Proceed with caution.
- Place your glass items into a canvas bag and tie it shut.
- Use hammer to break down the glass into small pieces. Aim to have pieces of about 1/2 inch big (= 1cm) if you want a fine mulch.
- Use sand paper to sand down or remove sharp edges of the broken-down pieces.
- The mulch is now ready to be used anywhere in your garden. However, if the glass mulch is to be placed on the ground such as into pathways, the base should first be covered with black plastic to save it from making its way into the soil.
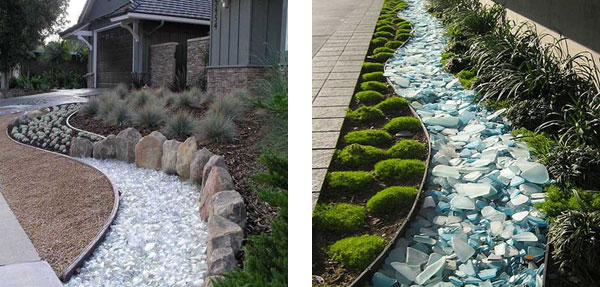
Beautifying garden beds
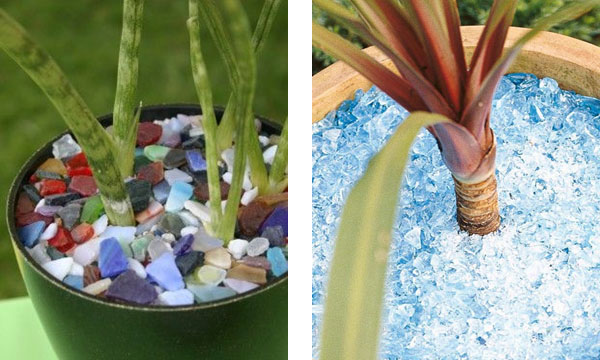
Figure 2 Pot filled with colorful mulch. Figure 3 Pot filled with mono color mulch
What to do with the glass mulch that you’ve made? One way to use it is in garden beds. If your mulch is especially colorful then it is perfect for landscaping, because when the sun rays hit the mulch in garden, it looks absolutely stunning. Glass mulch is used as an alternative to pebbles in creating garden beds, because it can look even more appealing than pebbles due to its inherent light reflecting nature.
Glass floats
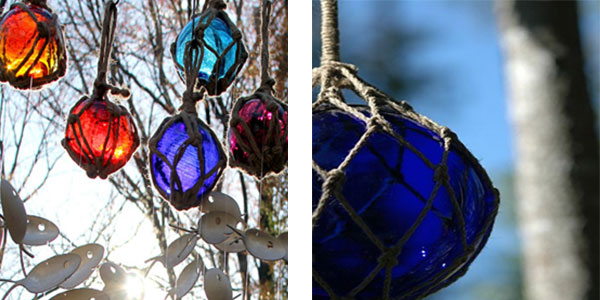
If you love Christmas and you wish it was around all year, then the next tip is definitely for you. Glass floats are small-ish balls that you often find hanging on trees and bring the needed little bit of sparkle to your garden.
Things required:
- Modge Podge
- Plastic cup
- Food coloring
- Various glass, old clear Christmas ornaments, glass bulb balls
- Net or twine
- Brush
Procedure:
- Pour some mod podge into the plastic cup.
- Mix in flood coloring.
- Color the glass product and wait for it to dry.
- Cut a piece out of the pre-made net or make a net out of twine big enough to comfortably wrap around the ornament.
- Cover each glass with net.
- Cut a long piece of string.
- Hang the glass float using the string.
- Sit, relax and enjoy the light dancing in the garden.
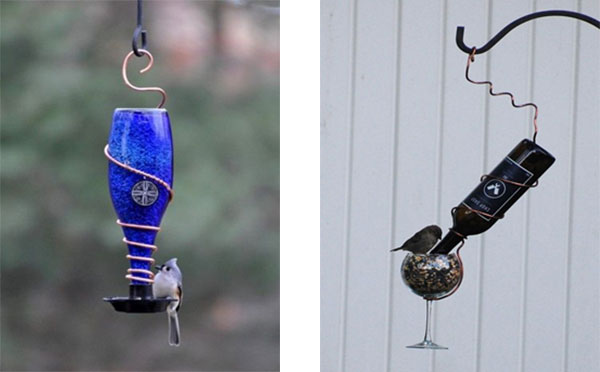
Bird feeder

Birds are always a welcomed garden decoration. Nothing makes the summer evening more special than a bird’s song. That’s why you might want to consider making a bird feeder out of recycled glass and help Mother Nature in two ways – by feeding the local wildlife and by reusing items that might be otherwise severely harming the environment.
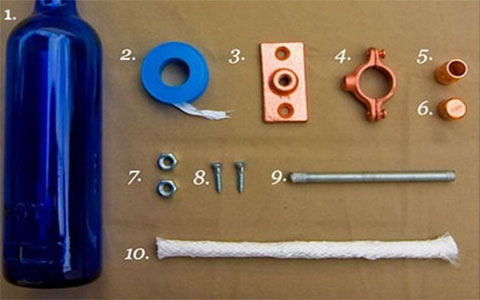
Things required:
- Iron hanger
- Wine glass
- Small plate
- Copper string
- Pliers and tape
Procedure:
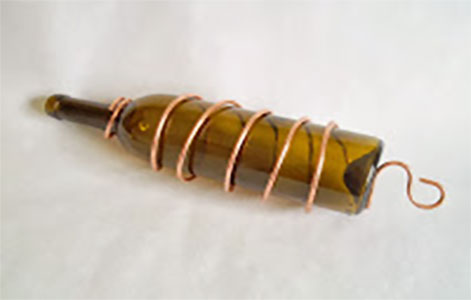
- Take the iron hanger and bend it using pliers.
- Then take the glass bottle and bend the copper wire around it. Keep extra few inches of wire towards the end to create a hook.
- Attach the small plate on the neck of the bottle using another piece of wire.
- Hang the bottle on the hanger.
- The hanger can be places anywhere in the garden such as a tree or a side of a wall.
- Fill the plate with bird food and you are ready.
Torches from wine bottles
Things required:
- Glass bottle
- Tape
- Holder
- Clip
- Nozzle
- Nozzle cap
- Bolts and nuts
- Iron rod
- Thick candlewick
- Fuel or oil
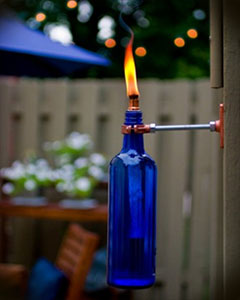
Procedure:
- Take the candlewick and place it inside the bottle, so 1-2 inches are still showing. Use a tape to secure it.
- Put the nozzle through the candlewick and wrap some tape around it.
- Place the clip around the neck of the bottle.
- Attach the iron rod with a clip.
- Then attach the holder to the wall, fill up with fuel and you’re done with your custom-made lantern!
Garden mushroom
Recycled glass can be used to create glass mushroom that stays beautiful throughout the year, whether it’s spring, summer, autumn or winter. These upcycled garden mushrooms can be made with any bottles and bowls.
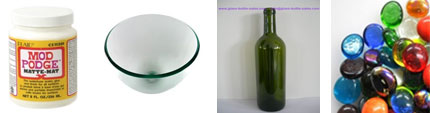
Things required:
- Glass bottle
- Glass bowl
- Small glass gems
- Mod podge
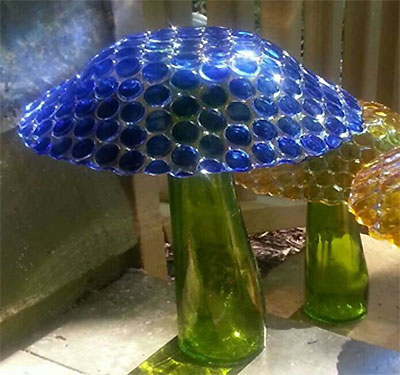
Procedure:
- Turn the glass bowl upside down.
- Paste the small glass gems on the bowl using Mod Podge.
- Then glue the bowl on the wine bottle.
- Let the piece dry for a few minutes and your garden mushroom is ready!
Vases from glass bulbs
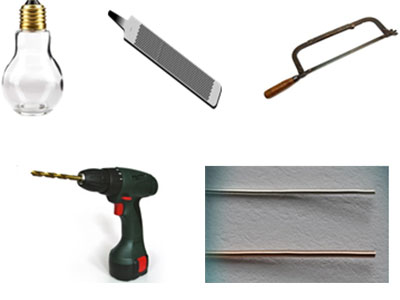
Fused glass bulbs can be used to create beautiful hanging vases. They can make your garden look so amazing that everyone will want to know your tricks!
Things required:
- Glass bulb
- Metal saw
- Metal file
- Drill
- Solid cord
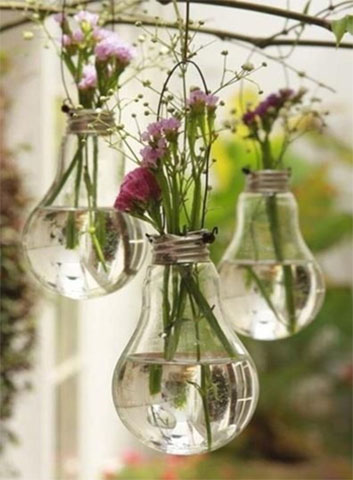
Procedure:
- Use the metal saw to cut through the metal base of the bulb.
- Use metal file to smooth out the sharp places.
- Drill holes on either side of the metal.
- Pass cord through the holes and bend the ends upwards.
- Tie a sting to the cod to hang the pots.
Rebecca writes for Midland Stone an online garden and building supply company in Ireland.
Share this article